Table of Contents
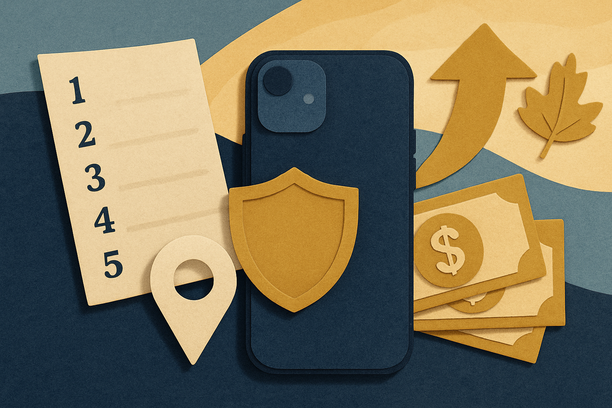
Key Takeaways
- Disable Find My iPhone before trade-in to avoid activation lock rejections and payment delays.
- Back up, erase, and verify that the device reaches the “Hello” screen—then stop using it.
- Gather proof of ownership (receipt, carrier records, or statements) to speed verification.
- Clean and photograph your iPhone and packaging to protect against condition disputes.
- Use a final checklist and score yourself—small fixes can unlock top-dollar offers.
Why Find My iPhone Matters More Than Ever in 2025
Find My iPhone isn’t just a convenience—it’s a fortress. That fortress is great for security, but it can turn trade-ins into headaches if you leave it on. When Find My stays active, Activation Lock ties the device to your Apple ID, blocking resets and resales.
In 2025, tighter iOS security means skipped prep can cost more than ever. Activation lock issues are a leading cause of delays and value loss—problems that are entirely preventable with a little planning.
“If a buyer can’t set up your phone, they can’t value it. Turn off Find My, verify, and only then ship.”
Step 1: Quick Status Check — Know Where You Stand
Start in Settings. Tap your name, then Find My, and note whether Find My iPhone and the Find My network are enabled. Don’t switch anything off yet—just confirm the current state.
Check iCloud dependencies. Tap Sign Out to preview what’s synced—Photos, Mail, Keychain, and app data—so you know what to back up. Then, on a browser, sign into iCloud.com to confirm you can see the device under Find My. If you can’t access your Apple ID, pause and reset your password before moving on.
Step 2: Safe Removal Process — Do It Right the First Time
If the phone is in your hand: Settings → [Your Name] → Find My → toggle off Find My iPhone → enter Apple ID password → confirm. If prompted again, confirm once more. Afterward, begin setup as if new—if you reach the Home Screen without any Apple ID prompts, you’re clear.
If you no longer have the phone: Sign into iCloud.com → Find My → select the device → choose Remove from Account → confirm. This remotely disables Activation Lock.
Pro tip: Erasing alone does not remove Activation Lock. If needed, erase first, then remove from your account. For a clear walkthrough, see Turn Off Find My iPhone Before Selling.
Step 3: Documentation and Proof of Ownership
Treat this like your device’s birth certificate. The best item is your original purchase receipt (Apple, carrier, or retailer). Can’t find it? Carrier device history, Apple purchase history, or a credit card statement can substitute. Financed devices may need a payoff statement.
Keep crisp digital copies in one folder. Clear photos of any paper records can save the day. For a comprehensive pre-sale prep, see The Ultimate Checklist Before Selling Your SmartPhone – iOS or Android.
“Documentation accelerates payment. No guesswork, no delays.”
Step 4: Data Security and Complete Wipe
Back up first. iCloud Backup is the quickest route: Settings → [Your Name] → iCloud → iCloud Backup → Back Up Now. Once saved, you can restore everything to your new iPhone.
Then go nuclear—erase. Settings → General → Transfer or Reset iPhone → Erase All Content and Settings. Enter your passcode and Apple ID when prompted, and confirm. When finished, the device should land on the “Hello” screen. Leave it there.
Don’t forget linked services. Remove cards from Apple Pay, sign out of Media & Purchases, and log out of sensitive apps beforehand. For a broader view on securing data pre-sale, read How to Manage Your Smartphone’s Security.
Step 5: Physical Preparation and Accessories
First impressions matter. Wipe the device with a soft, lint-free cloth; lightly dampen for stubborn smudges. Gently clear ports and speakers with a dry, soft brush—no liquids inside ports.
Assess condition and extras. Minor scuffs are fine; deep cracks reduce value. Include original accessories if you have them (box, cable, adapter)—they can provide a small boost. If the buyer doesn’t require them, the phone alone often carries most of the value.
Photograph the device from multiple angles before packing to document condition. For a safe clean, see How to Clean Your Phone Without Ruining It. Exploring where to sell? Try Best Local Selling Apps in the U.S..
Step 6: Trade-In Readiness Score and Final Checklist
Score yourself, 1–5 per category:
Find My iPhone Status: Fully disabled and device no longer in iCloud = 5. Unsure = fix before shipping.
Documentation Completeness: Original receipt (5), carrier records (4), card statement (3). None = needs attention.
Data Security: Backed up, fully erased, sitting on “Hello” screen = 5.
Physical Condition: Pristine with accessories (5); light wear (4); cracked/missing parts lower.
Totals: 18–20: golden; 15–17: nearly there; 12–14: fix gaps; below 12: pause and resolve issues.
Your final pre-shipment checklist:
- Confirm Find My iPhone is off and the device is removed from your iCloud account.
- Verify the phone shows the “Hello” screen—do not set it up again.
- Package the device securely with any required accessories.
- Include copies of proof-of-ownership documents.
- Photograph the packaged device for your records.
For a full, seller-friendly rundown, revisit The Ultimate Checklist Before Selling Your SmartPhone – iOS or Android.
Avoiding Common Pitfalls That Cost Money
Don’t rush Find My removal. Signing out of iCloud or erasing the phone is not enough. You must explicitly turn off Find My iPhone and confirm the device disappears from your account.
Watch family sharing and corporate controls. Family members or MDM policies can re-enable restrictions. Coordinate with your family organizer or IT team before wiping and shipping.
Timing matters. Don’t disable Find My weeks early (you’ll lose theft protection), and don’t wait until the last hour. Complete prep a day or two before shipping and stop using the device to avoid re-syncing data.
“Prepare once, correctly—then treat the device like it’s already sold.”
Maximizing Your Trade-In Value in 2025
Timing and competition work in your favor. Prices often peak right before new iPhone announcements and during back-to-school and early holiday seasons. Compare a few reputable buyers and weigh total value—speed, support, and prepaid shipping matter.
- Best windows: pre-September announcements, Aug–Sep back-to-school, Oct–Nov early holidays, and Feb–Mar refunds.
- Unlocked and higher-capacity models typically fetch higher offers.
- Standard colors appeal broadly; rare finishes can be hit-or-miss.
Exploring alternatives or local options? Check Best Local Selling Apps in the U.S..
When Things Go Wrong: Troubleshooting Guide
Problem: Can’t remember Apple ID password.
Solution: Start Apple’s account recovery and be ready with your trusted number or recovery key. Begin early—recovery can take time.
Problem: Find My iPhone won’t turn off.
Solution: Check Screen Time restrictions or MDM policies. If it’s a work device, coordinate with IT for removal.
Problem: Device doesn’t appear in iCloud’s list.
Solution: Verify you’re logged into the correct Apple ID and that the device has an internet connection.
Problem: “Activation Lock” during reset.
Solution: Stop. Disable Find My iPhone first, confirm removal from your account, then erase.
Problem: Buyer flags activation lock after receiving.
Solution: Remove the device from your iCloud account remotely, then notify the buyer to retry processing.
The GizmoGrind Advantage: Why Preparation Pays Off
Prepared devices get paid faster. When Find My is off, data is wiped, and paperwork is ready, evaluation zeroes in on condition and value—not roadblocks. That often means top-tier pricing and 24–48 hour payouts after receipt.
We know mistakes happen. Minor issues can be resolved quickly, but unprepared devices risk delays and reduced offers. Your diligence directly translates into more money—and less waiting.
GizmoGrind works with phones, tablets, MacBooks, Apple accessories, and smartwatches across the U.S. We don’t accept iCloud-locked, blacklisted, lost/stolen, or water-damaged devices—exactly why preparation matters.
Your Trade-In Success Starts Today
Fall 2025 is a prime time to trade in. Demand is strong, buyers are competitive, and tools for safe prep are better than ever. Success hinges on the six-step system above—status, removal, documentation, data security, physical prep, and final verification.
Don’t let Activation Lock derail value. Spend a focused 30 minutes now to avoid rejections, delays, and lower offers later. Start with Step 1, and move steadily through—your next owner (and your wallet) will thank you.
Frequently Asked Questions
Do I need to turn off Find My iPhone if I already erased the device?
Yes. A factory reset does not remove Activation Lock. You must explicitly disable Find My iPhone and remove the device from your iCloud account to prevent trade-in rejection.
How can I confirm Activation Lock is fully disabled?
After turning off Find My iPhone, sign into iCloud.com and ensure the device is no longer listed. On the device, progress to the setup flow and verify you can reach the Home Screen without Apple ID prompts.
What if I can’t find my original receipt?
Use carrier device history, Apple purchase history, or your credit card statement. For financed phones, include a payoff statement to show you’re authorized to sell.
Is it safe to ship without accessories?
Usually yes—most value resides in the phone itself. However, clean presentation and original accessories can boost perceived value, so include them if required or readily available.
When is the best time to trade in for maximum value?
Historically, just before September announcements, during back-to-school, and early holidays yield strong prices. Avoid the immediate post-launch window when the market is flooded with older models.